Survive Broly Randomizer Mode Guide
Survive wild role stacks, Dio piles, and the lone survivor challenge without feeding the blender.
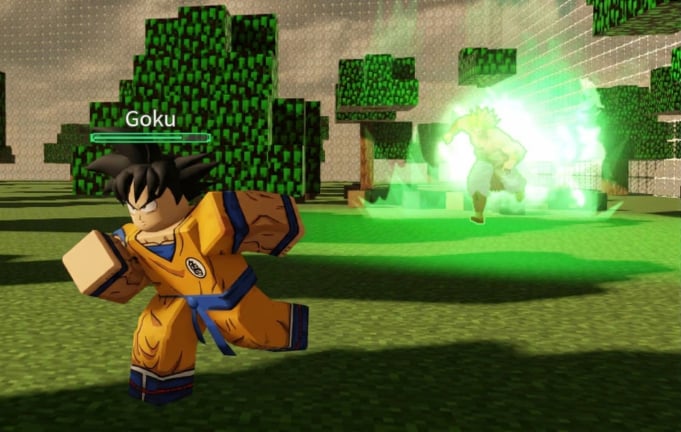
Randomizer Mode is Survive Broly’s chaos dial turned past eleven. Classic rounds teach clean 1vAll tempo. Infection teaches damage discipline. Randomizer teaches you to accept that the lobby composition can rewrite the rules before the first wall falls. This guide explains what Randomizer changes, how to plan as survivor or hunter when stacks go absurd, how the lone survivor challenge fits the picture, and how the mode differs from Classic and Infection Mode.
If you are brand new, finish Getting Started and one clean Survivor round from How to Survive before you chase Randomizer glory. The Craft gameplay review embedded on Getting Started also covers Randomizer, Infection, maps, and the shop — watch it once, then come back here for mode-specific habits.
What Randomizer changes
In Classic, you usually know the threat silhouette: one primary hunter fantasy (often Broly or Dio Brando) against a lobby of hiders. Randomizer loosens that contract. Role assignment can produce wild stacks — including rounds that feel like several hunters at once, meme piles of the same kit, or pressure that no single closet can absorb.
Practical consequences:
- Mid-map becomes a blender faster.
- Safe “favorite rooms” expire in seconds when multiple agents search.
- Information is noisier: footsteps and destruction come from more directions.
- Ego peeks that work in Classic become free deaths.
- The hospital’s destructible geometry still matters, but exits get contested by more players.
Treat Randomizer as a stress test for spacing and map literacy from the Maps guide, not as a place to showboat.
Stack chaos and meme rounds
Community clips love absurd compositions — many Dios locking lanes, Broly deleting cover while teammates sweep stairs, or hunter counts that make the timer feel shorter than it is. Exact spawn odds can shift with patches listed on the Updates Hub, so do not memorize a single probability table from an old video.
What you can memorize:
- Identify the mode from the HUD in the first few seconds.
- Count how many hunters or hunter-like threats are live as soon as you have safe vision.
- Scatter off spawn — clustering is how Randomizer wipes half a lobby in minute one.
- Pick edge loops with dual exits; abandon mid parade routes.
- Budget mobility for leaving rooms before a chase starts, not for cinematic escapes after you are already clipped.
When the stack is funny, play boring. Funny stacks punish vanity.
Survivor plan for Randomizer
Win condition stays the same
Live the timer. Badge goals are optional. Living is winning.
Opening thirty seconds
Leave the spawn cluster immediately. Claim a wing with two exits and a stair option. Do not wait to “see who the hunter is” while standing in a group selfie. Read Controls if your crouch or sprint binds feel clumsy under multi-threat audio.
Mid-round habits
- Rotate on destruction audio even if you have not seen anyone.
- Cross lobbies only with a reason and a next room already chosen.
- Refuse to re-peek a Dio control angle; Randomizer multiplies lockdown kits.
- Help teammates only when the path does not feed a second hunter waiting on the stair.
- Prefer mobility and information kits from the Survivor Tier List over flashy vanity unlocks from the Shop guide.
Late timer
If several hunters remain, stalling in one prop room is a trap. Keep a soft loop: room → hallway → floor change → dual-exit hold. When the map is shredded, linear leftover corridors favor hunters — plan your last minute before the walls finish falling.
Hunter plan for Randomizer
Randomizer hunter rounds are not always “easy because more killers.” Communication and lane ownership decide whether survivors reset forever or panic into downs.
- Split wings instead of triple-stacking the same closet.
- Break one favorite hold early so survivors cannot loop the same prop room.
- Use Broly demolition to open vertical shortcuts; use Dio control to seal a stair while a teammate sweeps.
- After a kill, leave someone on the converted pressure path if Infection-style rules or multi-threat pressure apply — otherwise survivors regroup behind you.
- Avoid tunnel vision on one loud player while three quiet hiders sit on the opposite floor.
Deep chase fundamentals still live in How to Win as Hunter and the Hunter Tier List. Randomizer just multiplies the cost of ignoring map control.
Lone survivor challenge
Community and wiki discussion treat lone survivor as the Randomizer extreme: living through a brutal multi-hunter stack (often framed as a 27v1-style fantasy in a 28-player server). Treat that framing as a skill ceiling goal, and verify the live badge text on the Roblox experience page when you attempt it — public badge strips change, and rarer challenges are easy to misremember.
Honest attempt route:
- Confirm you are in Randomizer before investing the attempt.
- Equip your safest mobility survivor.
- Scatter hard; never mid-camp.
- Mute hero saves across the map.
- Play edges and dual-exit rooms only.
- If you take early pressure you cannot cleanly break, reset mentally and treat the round as practice, not a failed identity.
Pair this goal with the broader Badges guide so you do not confuse it with the common Survivor badge from a normal full-timer hider win.
Randomizer vs Classic vs Infection
| Mode | Core pressure | Survivor priority | Hunter priority |
|---|---|---|---|
| Classic | One primary chase fantasy | Stall and rotate | Tempo and demolition |
| Infection | Conversions + chip damage | Take zero optional hits | Early tags and spreads |
| Randomizer | Unstable role stacks | Scatter, edges, dual exits | Split lanes, deny resets |
Infection still deserves its own page because conversion rules and the untouchable challenge are a different skill exam. Randomizer’s exam is composition chaos. When modifiers feel stacked, default to the stricter rule set: take less damage, leave rooms earlier, and stop peeking for content.
Common Randomizer mistakes
- Standing in the spawn selfie to watch the funny stack
- Treating a multi-Dio lobby like a single Classic chase
- Spending the shop budget on cosmetics before a mobility tool — see Shop
- Ignoring destruction audio because “someone else is being chased”
- Tunneling one survivor as hunter while an entire wing resets
- Confusing lone survivor attempts with ordinary Survivor badge progress
For a wider list of throw habits across modes, read Common Mistakes.
Related pages
- Getting Started — video breakdown and first-hour checklist
- How to Survive
- How to Win as Hunter
- Infection Mode
- Maps
- Badges
- Updates Hub
Randomizer Mode is Survive Broly at its meme peak and its spacing exam. The players who laugh at the stack and leave mid in the first ten seconds are the ones still alive when the timer — and maybe the lone survivor challenge — finally clears.
Frequently Asked Questions
Quick answers for Survive Broly players.
What is Randomizer Mode in Survive Broly?
Randomizer loosens normal role assignment so lobbies can produce chaotic hunter stacks and meme compositions instead of a clean Classic 1vAll feel.
How do I earn the lone survivor challenge?
Community guides frame it as surviving a brutal Randomizer multi-hunter stack. Confirm the live badge text on Roblox, scatter off spawn, and play dual-exit edge routes only.
Is Randomizer harder than Infection?
They stress different skills. Infection punishes chip damage and conversions; Randomizer punishes bad spacing when role stacks explode.
Should beginners queue Randomizer first?
No. Learn Classic survivor rotations first, then attempt Randomizer once you can leave spawn without clustering.
Where can I watch Randomizer gameplay?
The Craft Survive Broly review embedded on Getting Started covers Randomizer, Infection, maps, and the shop.